
Toyota Highlander 2014-2019 Leveling Lift Kit Install Instructions
Welcome to the Toyota Highlander 2014–2019 lift kit installation instructions guide. This detailed walkthrough will provide step-by-step instructions to help you successfully install the Function and Form Front and Rear Leveling Lift Kit, which adds 2 inches to the front and 1.5 inches to the rear of your vehicle. We’ll cover the recommended tools, torque specs, and best practices to ensure a clean install. Whether you’re aiming for improved ground clearance, a more aggressive stance, or better capability for occasional off-road driving, this guide is designed to walk you through each step. Although this tutorial is focused on the Function and Form lift kit, the process is similar for other high-quality spacer-based leveling kits for this generation of Highlander.
The third-generation Toyota Highlander, produced from 2014 to 2019, is known for its balance of comfort, reliability, and everyday practicality. With a unibody platform and independent suspension front and rear, the Highlander offers a smooth ride while still being capable of light off-road duties when equipped with the right modifications. Adding a lift kit enhances both the vehicle’s presence and functionality, allowing for the use of slightly larger tires and improving approach angles without drastically altering the Highlander’s drivability. This makes it an ideal candidate for a modest leveling lift, giving owners extra clearance for steep driveways, deep curbs, and uneven terrain without sacrificing on-road comfort.

TOOLS NEEDED
Sockets: 22mm, 21mm, 19mm, 17mm, 14mm, 12mm, 10mm.
Wrenches: 19mm, 18mm.
Allen wrench: 8mm, 6mm
Trim removal tool.
Impact wrench.
Ratchet.
Torque wrench.
Rubber mallet.
Pry bar.
Spanner wrenches (provided with kit).
Floor jack.
Jack stands.
Flashlight (optional).
Measurements before install:
Front: 18 1/2″
Rear: 19″

Mark the windshield with tape to ensure proper alignment when reinstalling the wiper arms.
Remove the trim from the windshield wiper blades with a flat screwdriver.
Use a 14mm socket to remove the windshield wipers. Wiggle them gently to release.
Locate the plastic rivets on both sides of plastic cowl and remove them by first pushing down in the center to get them to release and remove.
Remove the cowl trim using a trim removal tool.
Lift the vehicle at the designated lift points.

Remove the 21mm lug nuts and take off the wheel.
Use a 10mm socket to remove the wheel speed sensor.
Use a 12mm socket to remove the brake line bracket and detach the ABS bracket clip.
Use a 17mm socket to remove the sway bar end links. You can use a 6mm Allen wrench to hold the end link from spinning.
Use a 22mm socket to remove the two bolts securing the lower strut mount.
Remove the three 14mm top hat nuts to remove the strut assembly.

Install the spacer using the OEM hardware. Torque the 14mm nuts to 30 lb-ft.
Place the strut back into position and hand-tighten the top hat nuts.

Install the end link spacer using the provided nut and washer. Torque the 19mm nuts to 45 lb-ft.
torque down the 2 bolts with a 22mm socket for lower mount 110 lb-ft.
Reinstall the wheel speed sensor and brake line bracket. Torque both to 5 lb-ft
Reinstall the wheels and torque the lug nuts to 76 lb-ft
Torque down the top hat nuts to 34 lb-ft.
Reinstall the plastic cowl and wiper arms. Torque the wiper arm nuts to 5 lb-ft.
This completes the front Highlander lift installation.
REAR INSTALLATION
Remove the wheels using a 21mm socket.

Loosen, but do not remove, the 19mm nut on the front lower control arm.
Use 10 mm socket to remove nuts and lift fender liner.
Use a 14mm socket to remove the shock top hat bracket.
Use a 14mm and 17mm socket to remove endlink bracket.
Loosen but do not remove 14mm camber bolt.
Support the lower control arm to remove the knuckle bolt, then carefully lower the support to remove the spring.
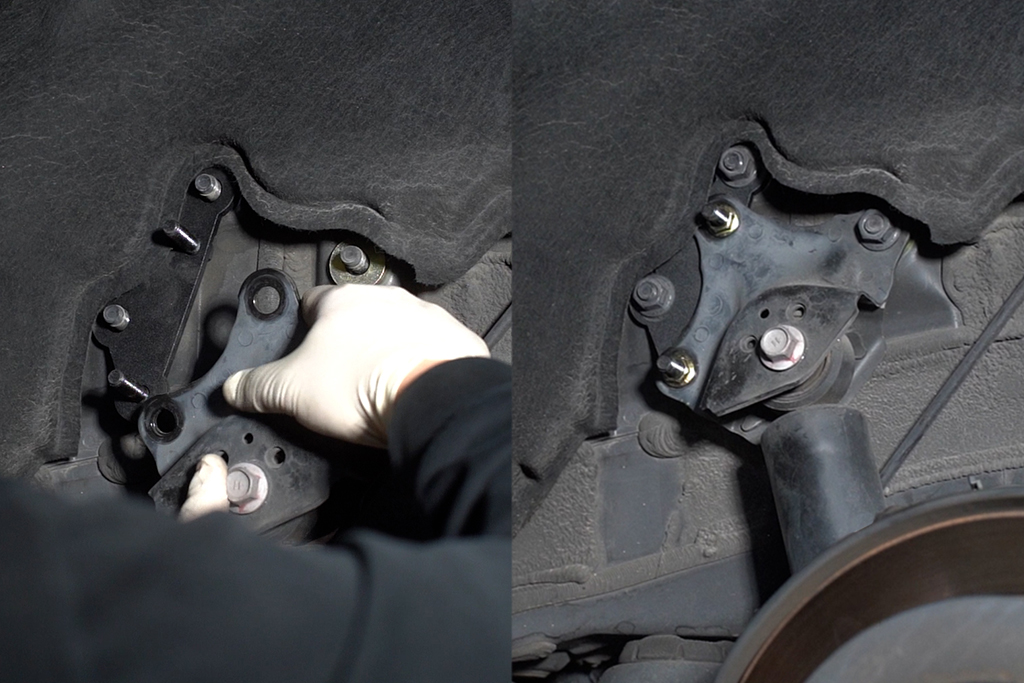
Install side-specific shock extension bracket (driver side shown). Torque the factory nuts to 45 lb-ft. and the M10 nuts to 30 lb-ft.

Install the endlink extender to the OEM link lower bracket with a 19mm socket and 18mm wrench and torque to 35 lb-ft.

Place the top spring insulator into the spacer to secure it in place, then place the assembly on top of the spring for installation.
Jack lower control arm to align mount and knuckle hole, insert bolt, torque to 110 lb-ft.
Torque down the front lower control arm mount to 83 lb-ft.
Reinstall the wheels and torque the lug nuts to 76 lb-ft.

This completes the Highlander lift installation Instructions guide. An alignment is recommended one week after installation to allow the suspension to settle properly.
Learn about us here
Follow us on Instagram