Toyota Supra A90 2019-2026 Coilover Installation Instructions

Welcome to the 2020–2024 Toyota Supra A90 coilover install instructions. This step-by-step guide is designed to make your installation process smooth and straightforward. We’ve included the recommended tools, factory torque specs, and key tips to help you get the best results. While this walkthrough highlights the Function and Form Type 3 Coilover kit, the same installation principles apply across similar suspension configurations. For reference, our test vehicle is a 2021 Toyota Supra A90 equipped with 255/35/19 front and 275/35/19 rear tires on factory wheels. Once installation is complete, we recommend scheduling a professional alignment after a short settling period to ensure proper handling, stability, and tire wear. A link to our video tutorial is available at the end of this post for those who prefer a visual guide.
The Toyota Supra A90, introduced in 2020, represents a modern return of an iconic performance platform. Built on a rigid chassis with near-perfect weight distribution and a rear-wheel-drive layout, the A90 Supra delivers exceptional balance, power, and driver engagement straight from the factory. Its advanced suspension design—featuring a MacPherson strut front and multi-link rear—provides a strong foundation for performance upgrades, especially when precision tuning is the goal.
Installing Function and Form Type 3 coilovers allows Supra A90 owners to fully dial in ride height, damping response, and overall handling character. With adjustable damping and performance-focused valving, the Type 3 system enhances cornering stability, reduces body roll, and sharpens steering feedback without sacrificing daily drivability. Whether you’re refining a street setup, preparing for spirited canyon driving, or building toward track use, coilovers are one of the most effective upgrades to unlock the A90 Supra’s full performance potential.

TOOLS NEEDED
Sockets: 21mm, 19mm, 17mm, 16mm, 14mm, 13mm, 10mm.
Torx socket: 16mm, 12mm.
Wrenches: 21mm, 18mm.
Impact wrench.
Ratchet.
Torque wrench.
Trim removal tool.
Prybar.
Spanner wrenches (provided with kit).
Measuring tape (provided with kit).
Floor jack.
Jack stands.
Flashlight (optional).

Before beginning the installation, measure the distance from the center of each wheel to the fender for both the front and rear.
Determine your desired ride height adjustment, then write down these measurements for reference.

Safely lift the vehicle using the designated jack points.
Remove wheel by removing lug nuts with a 17mm socket.
Remove the abs and shock sensor from the bracket.

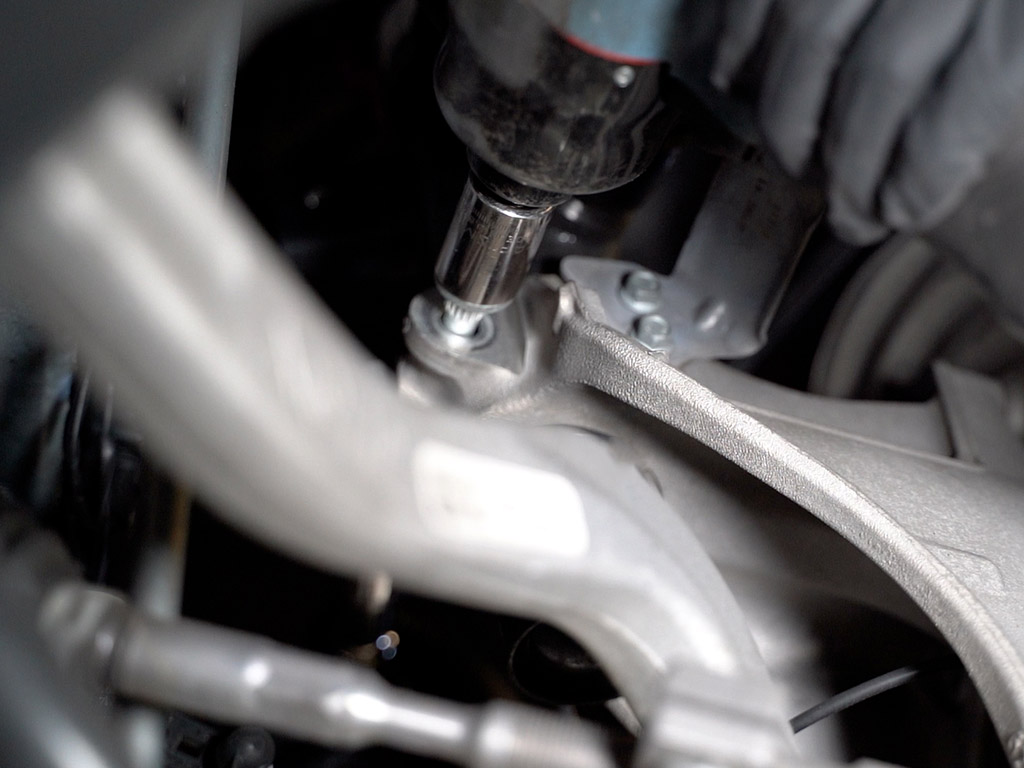
Use a 16mm torx Socket to remove the end link from the strut.
Using a trim removal tool, remove the plastic covers that are over the struts.
Loosen but do not remove the top hat nuts with a 13mm socket.
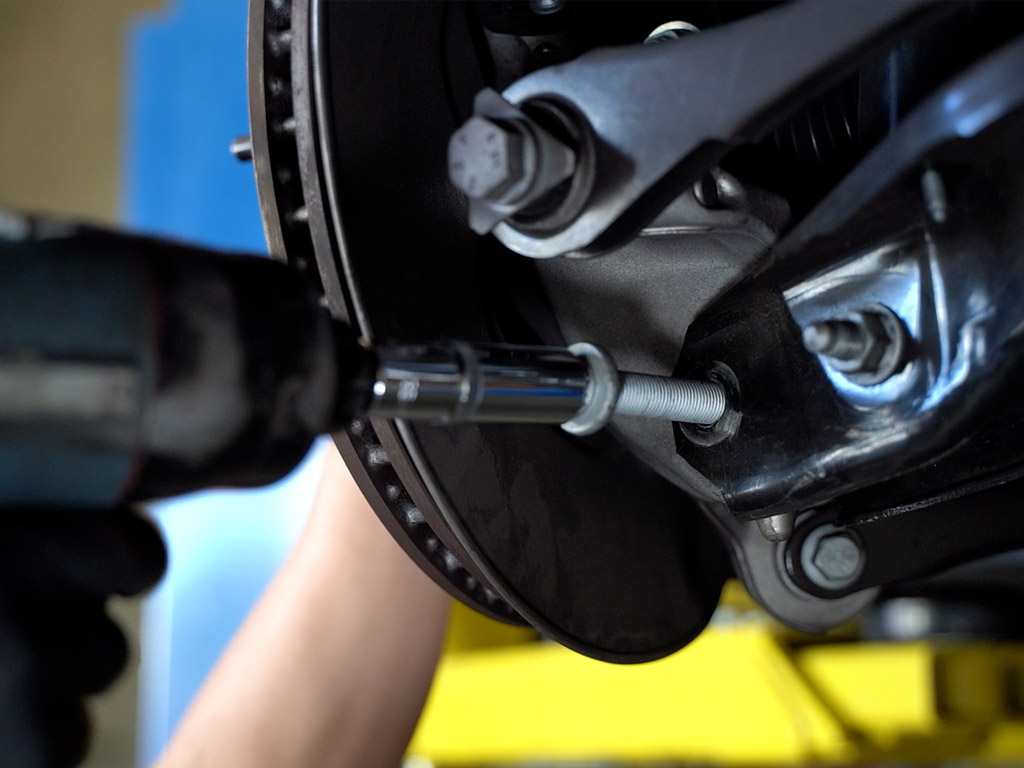
Remove the lower mount bolt and nut with a 18mm socket.
Remove the tie rod with a 21mm socket.
Loosen, but do not remove, the inner bolt on the lower control arm. Use a pry bar to separate the strut from the spindle.

Remove the top hat nuts and remove the strut.
Adjust coilover to desired height.
Place strut into place and hand tighten the top hat nuts.
Use a jack to raise the spindle into the strut.

Torque the top hat nuts to 21 lb-ft, then tighten 90 degrees.
Torque the lower control arm bolt to 121 lb-ft, then tighten 90 degrees.
Torque the lower mount bolt to 41 lb-ft.
Torque the endlink to 41 lb-ft.
Install the wheel and torque the lug nuts to 101 lb-ft.
This concludes the front Toyota Supra coilover instructions.
REAR INSTALLATION
Remove wheels by removing lug nuts with a 17mm socket.
Unclip the shock sensor from the shock, and remove the ABS sensor from the bracket.
Remove the cover over the spindle using a 10 mm deep socket.
Remove the lower mount bolt on the shock using an 18 mm socket and an 18 mm wrench.

Remove the lower control arm bolt with a 21mm socket and 21mm wrench.
Pull down on the lower control arm and remove the spring.
Remove the two top hat nuts with a torx 12mm socket and remove the strut.
Remove the OEM rear top hat nut using a 14 mm socket and remove the top hat. Install the OEM top hat onto the new coilover strut and torque the nut to 25 lb-ft.
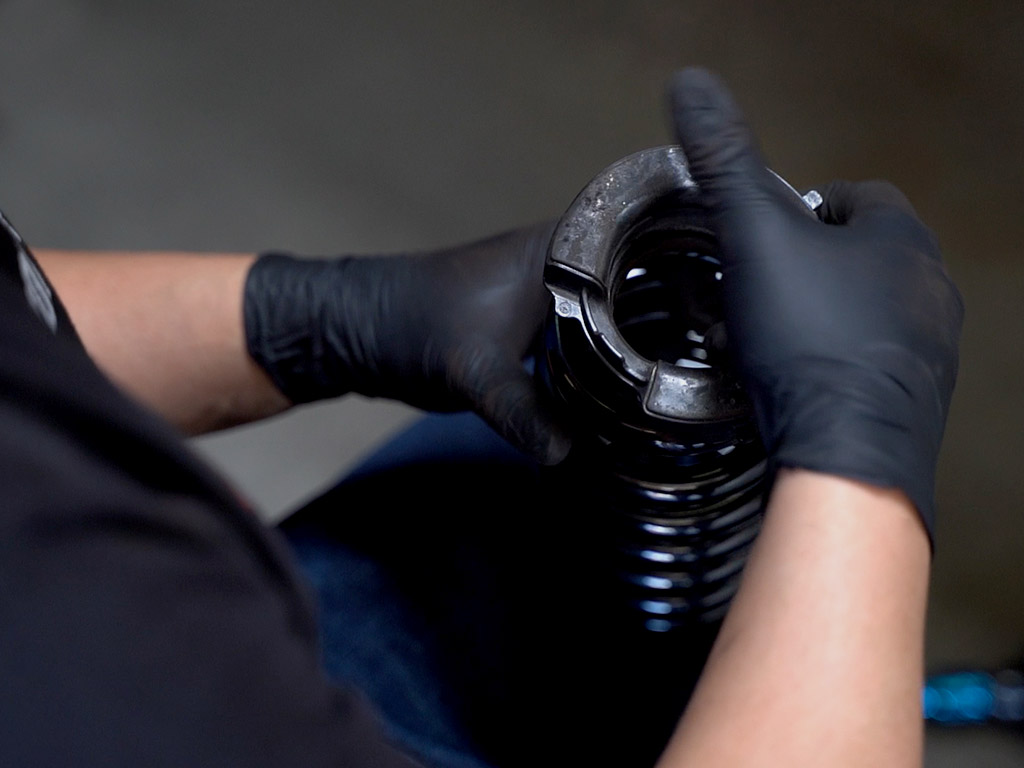
Make sure to use the OEM Spring Insulator on the new spring. Adjust spring height and place spring into place.
Place the strut in place and hand tighten the top hat nuts.
Compress the lower mount using a jack, then torque the spindle bolt to 120 lb-ft + 90 deg.
Torque the shock lower mount bolt to 101 lb-ft.
Torque the top hat nuts to 21 lb-ft, then tighten 90 degrees.

Clip the abs sensor into place.
Use a zip tie to secure the damping sensor away from the wheel. You can use cancellers to clear any error codes.
Reinstall the cover and using a 10 mm deep socket.
Reinstall the wheels and torque the lug nuts to 80 lb-ft.
This completes Toyota Supra coilover install instructions. An alignment is recommended one week after installation to allow the suspension to settle properly.

Learn about us here
Follow us on Instagram